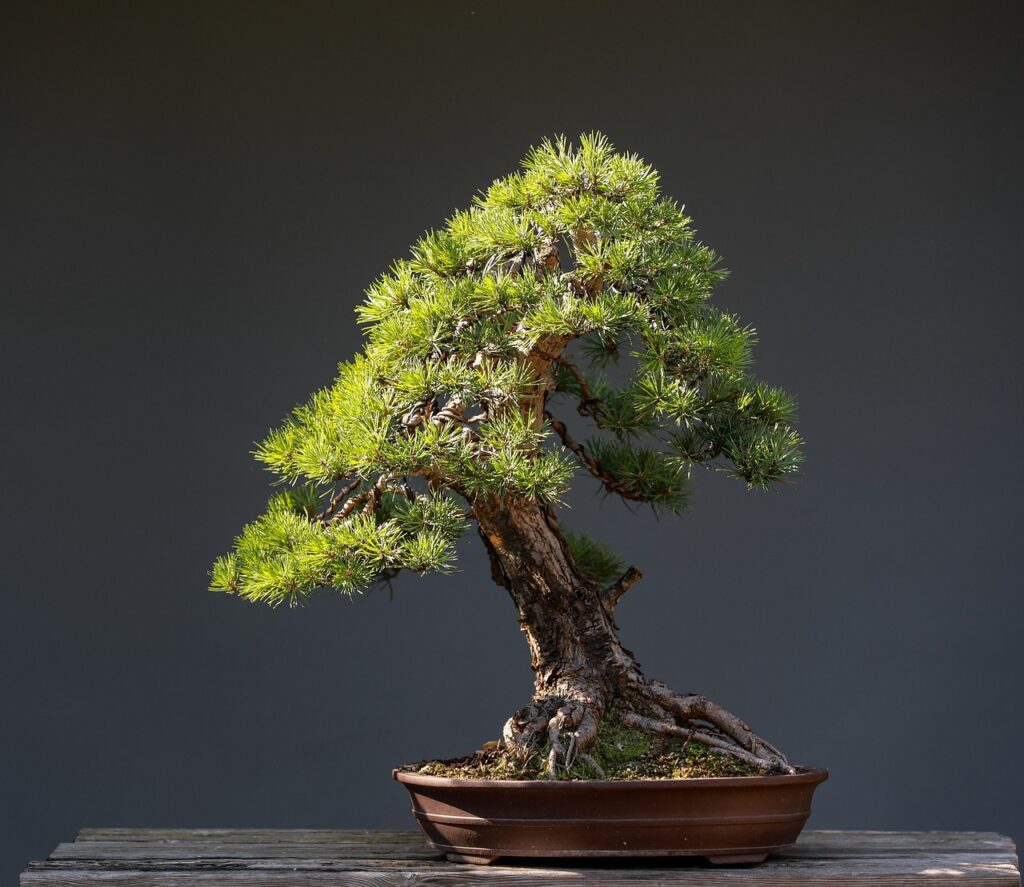
Juniper bonsai wiring is one of the most important techniques used to shape and train juniper trees into elegant bonsai designs. By carefully applying wire to branches, bonsai growers can guide the tree’s growth, create natural curves, and establish the structure of the bonsai over time.
Junipers respond particularly well to wiring because their branches are flexible when young and can hold their new shape once trained. When done correctly, juniper bonsai wiring allows enthusiasts to transform ordinary nursery stock into beautiful miniature trees with character and movement.
Why wiring is essential for juniper bonsai
Unlike many deciduous trees that rely heavily on pruning, junipers are shaped primarily through wiring and directional growth. Their branches naturally grow outward and upward, which means bonsai artists must guide them into the desired design.
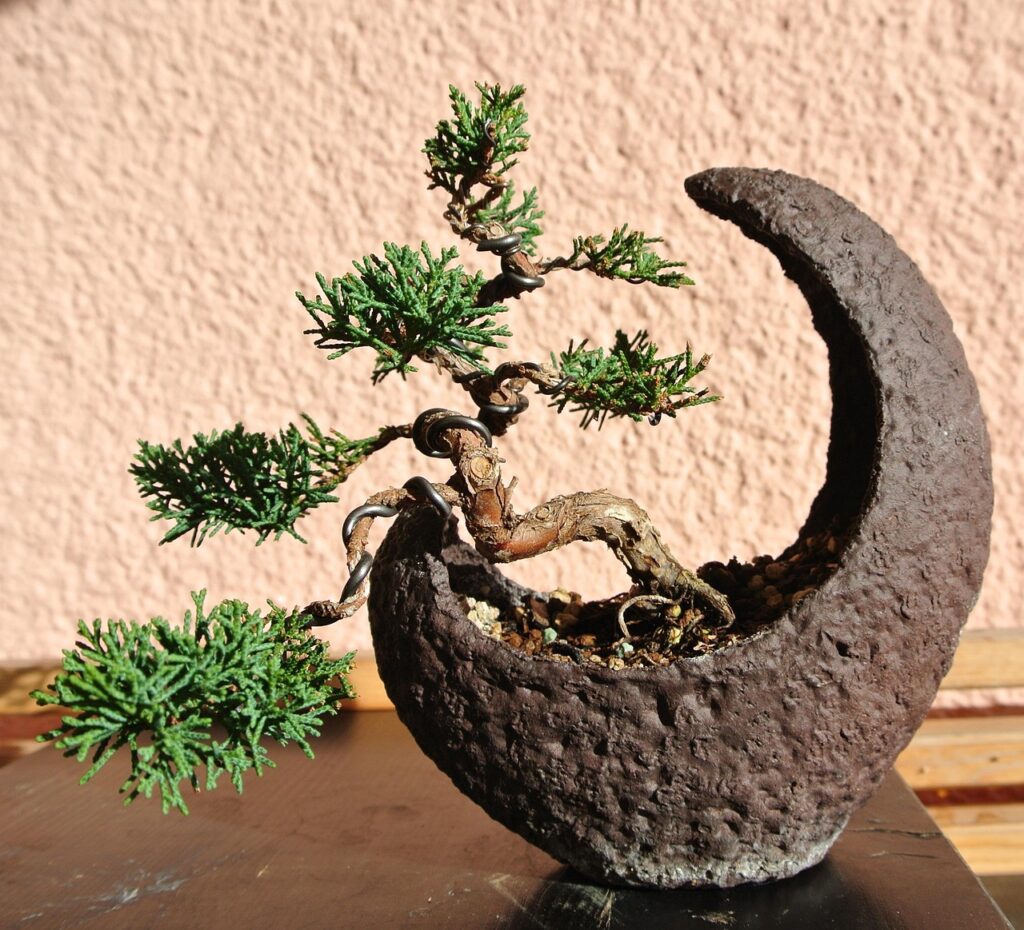
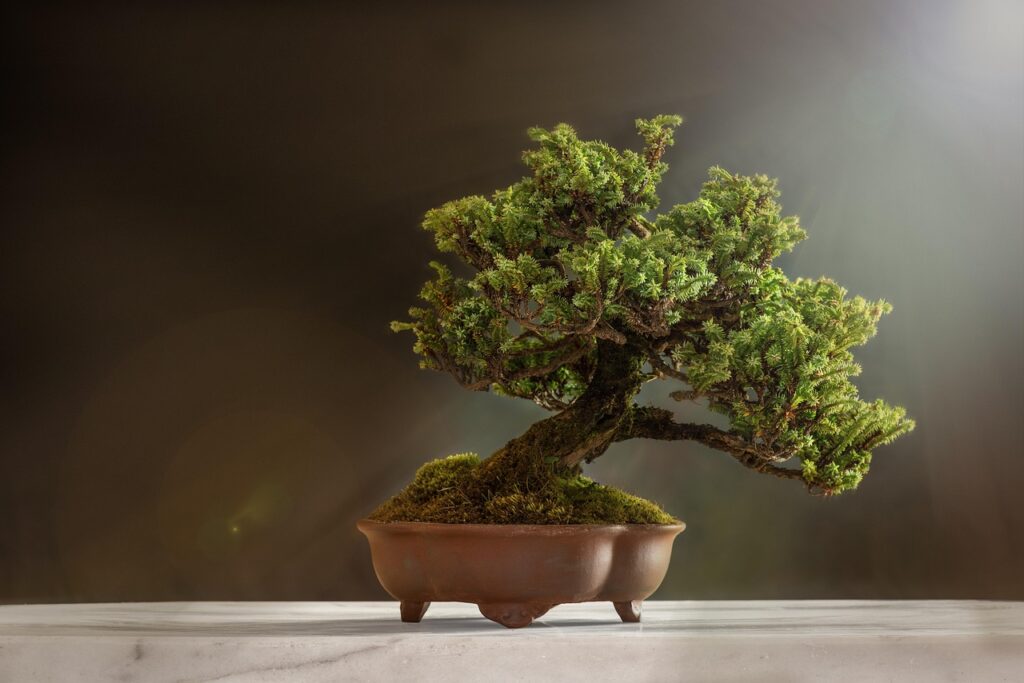
Through proper juniper bonsai wiring, growers can create movement in the trunk and branches, adjust the position of foliage pads, and establish the overall style of the bonsai. This technique allows the tree to develop the classic layered structure commonly seen in juniper bonsai.
Because junipers hold their shape well once set, wiring can produce long-lasting results when done with patience and care.
Best time to perform juniper bonsai wiring
Timing plays an important role in successful juniper bonsai wiring. Junipers can technically be wired at various times of the year, but certain seasons are more suitable for reducing stress on the tree.
Many bonsai growers prefer wiring during late autumn, winter, or early spring when growth is slower and branches are easier to manipulate. During these periods, the tree is less likely to experience damage from bending.
However, wiring can also be done during the growing season if care is taken to monitor the wire closely. Rapid growth can cause wires to bite into the bark if they are not removed in time.
How to wire a juniper bonsai
Successful juniper bonsai wiring requires patience and careful handling of the branches. The goal is to guide the branch into position without cracking or damaging the bark.
Start by selecting the appropriate wire thickness. The wire should be strong enough to hold the branch in place while still allowing you to apply it smoothly along the branch.
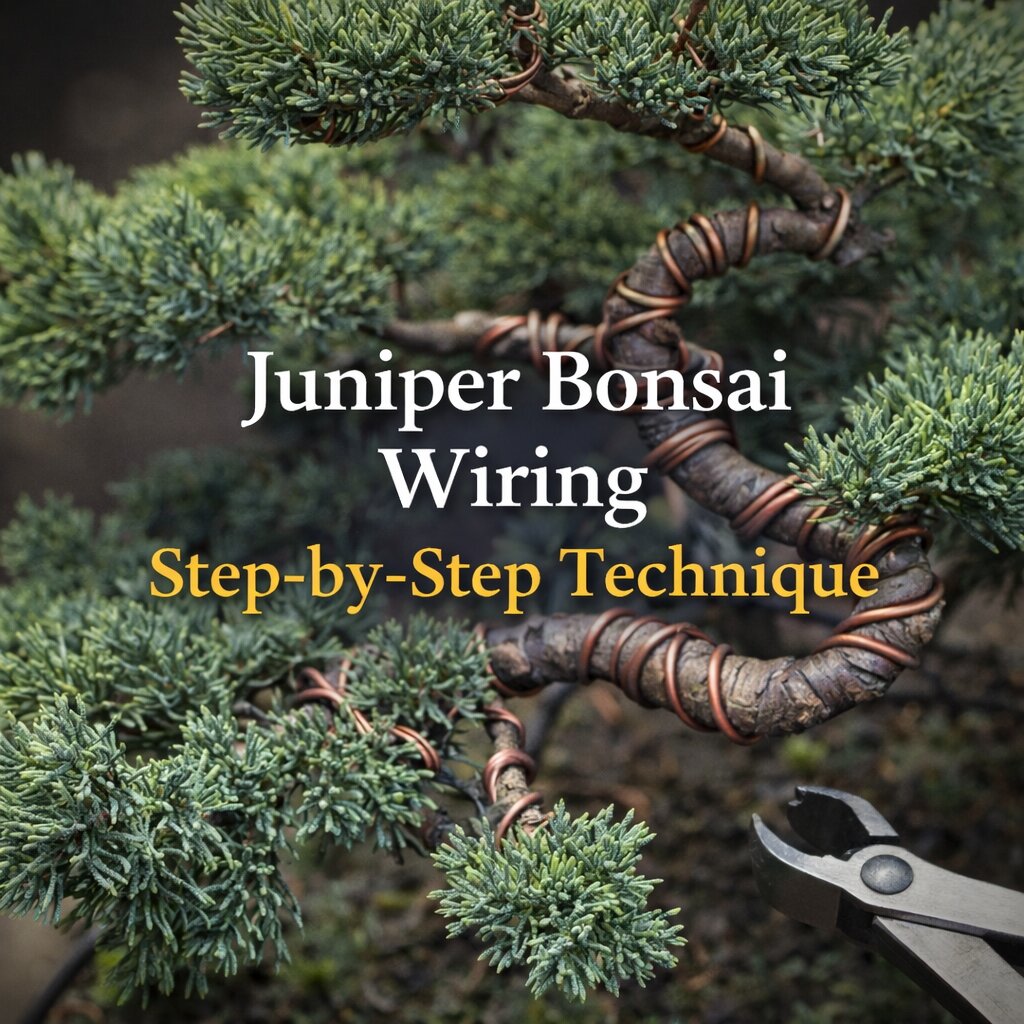
Begin wrapping the wire around the trunk or branch at an angle of roughly 45 degrees. This provides enough support while allowing the branch to be bent into position. Once the wire is applied, gently bend the branch to the desired shape using slow and controlled movements.
Avoid forcing the branch too quickly, as junipers can still snap if excessive pressure is applied.
Step-By-Step Juniper Bonsai Wiring Technique
1) Prepare the tree and choose the branch plan
Before you touch wire, study the tree from the front you want to keep. Decide which branches you want to lower, which you want to open outward, and which you want to compact into foliage pads. With juniper bonsai wiring, having a plan matters because once the branches move, the whole silhouette changes. If the tree is very full, lightly thin congested foliage first so you can see the branch lines clearly.
2) Pick the right wire thickness
A simple rule that works well for juniper bonsai wiring is to choose wire that is roughly one-third to one-half the thickness of the branch you are wiring. Too thin and the branch springs back. Too thick and you increase the risk of damage while applying. Aluminium wire is usually easier for beginners, while copper wire is stronger but takes more skill to apply neatly.
3) Anchor the wire properly
Every wired branch needs a stable anchor point so the wire can hold shape when you bend. For most junipers, you can anchor by wrapping the wire around the trunk once, or by wiring two branches together using one piece of wire. Good anchoring is what makes juniper bonsai wiring feel controlled instead of messy.
4) Wrap at a clean 45-degree angle
Start wrapping from the base of the branch and move outward to the tip. Keep a consistent 45-degree angle and aim for even spacing. Do not overlap loops. The wire should sit firmly against the bark, but it should not bite in at the moment of application. Neat wrapping gives better holding strength and reduces pressure points.
5) Wire two branches with one piece when possible
A classic bonsai technique is to wire two branches that emerge near each other with a single wire. You wrap around the trunk between them once, then run the wire out along each branch. This improves stability and often looks cleaner. It is especially useful in juniper bonsai wiring because you are commonly positioning multiple branches into layered pads.
6) Support the branch while bending
When it is time to bend, do not just pull from the tip. Use your fingers to support the branch close to where the bend will happen. Bend slowly and in small increments, checking the shape from different angles as you go. Juniper branches can be flexible, but sudden pressure can cause cracking, especially on older wood.
7) Set the branch position in stages
With juniper bonsai wiring, it is better to make two or three smaller bends than one big bend. First, bring the branch roughly into the right direction. Next, refine the line and create gentle movement. Finally, adjust the tip and secondary branches so the foliage forms a natural pad shape.
8) Create space for light and airflow
As you position branches, keep one important goal in mind: light must reach the inner foliage. If you compress everything too tightly, the inner growth weakens and dies back over time. Good juniper bonsai wiring opens “windows” in the foliage so the tree stays healthy while still looking compact and refined.
9) Check wire bite regularly
Junipers can swell during growth periods, and wire marks can happen faster than beginners expect. Check the wired branches every week or two in active growth. If the wire starts to bite in, remove it immediately. It is better to rewire later than to scar the branch permanently.
10) Remove the wire correctly
Never unwind wire off a juniper branch. Instead, use wire cutters and snip the wire off in small sections, working from the tip back toward the base. This prevents bark damage and protects fragile branchlets. After removal, allow the branch to settle. If it springs back too much, rewire with better anchoring or a slightly thicker wire.
How long wiring should stay on a juniper bonsai
After shaping the juniper branches, the wire should remain in place long enough for the tree to set its new structure. For many junipers, this can take several months depending on growth conditions.
During this period, regularly inspect the tree to ensure the wire is not cutting into the bark. If the branch begins swelling around the wire, it should be removed immediately to prevent scarring.
Monitoring the tree closely is an essential part of proper juniper bonsai wiring.
Common mistakes when wiring juniper bonsai
Beginners sometimes make mistakes that can damage the tree or limit its development.
• Using wire that is too thin to hold the branch in place
• Applying wire too tightly around the branch
• Bending branches too quickly or aggressively
• Leaving wire on the tree for too long
Avoiding these issues helps ensure that juniper bonsai wiring remains a safe and effective technique for shaping the tree.
Developing beautiful juniper bonsai through wiring
With patience and practice, juniper bonsai wiring becomes one of the most rewarding parts of bonsai cultivation. It allows growers to bring artistic vision to life while guiding the natural growth of the tree.
Combined with pruning, proper light exposure, watering, and fertilisation, wiring helps create the elegant forms that make juniper bonsai some of the most admired trees in the bonsai world.
Over time, carefully wired branches develop graceful curves and layered foliage pads that give the bonsai its distinctive character.